
What should be the first thing you look for in your drill?
Well, it depends on the jobs you’re going to do with it.
Firstly, is the drill up to the job? It may be a gorgeous looking yellow or blue drill with 20 plus torque settings, and a hammer setting, but is it too much, will you ever use it and all the professional extras that come with it? Would it be better to have a more compact version, a cordless drill, or a drill without hammer on?
Hopefully we can help you decide what to buy and whether it really is value for money.
But first a few common Errors made by users of drills:
1 – The hammer setting.
Do you need the hammer setting on? Do you need a hammer setting at all? Only if you’re using the drill for drilling masonry. Never have the hammer on to drill wood, steel or tiles of any kind! If you do you will ruin the drill bit, and the drill.
Blindingly obvious – Never use the hammer setting on tiles…..unless you want to smash them. Never use the hammer setting on steel or wood; if you do you will not get a clean hole after use.
2 – The wrong type of drill bits.
Stone, asphalt, masonry, and breeze blocks are abrasive, therefore will damage your steel/metal drill bit if using them on any of these materials. Yes, there are all purpose drill bits that say they”ll do any material like Bosch’s multipurpose drill bits. However once used on masonry, you will find they will have their edge abrased and dulled, and won’t be able to use them as effectively on steel, brass, aluminium, plastic or even wood afterwards. Equally if you use a masonry drill
Blindingly obvious – Check the drill bit before using it: Check the box, of package if you still have it. If it has an arrow-point look, this is a tile drill bit. If it has a single step to a lower size, this will be a piloted bit (possibly for wood, or metal)
3 – The wrong speed settings.
Most people won’t know, but high quality drill bits like Dormer, Gurhing, and others were designed to be used in pillar drills, lathes, milling machines or other non-handheld machines and at exact speeds and pressures to get the exact drilling finish desired. Usually in a handheld drill people will go too fast for the size of the drill bit, meaning they “burn the bit out”, blunt it or break it.
A good rule would be the larger the bit, the slower the rpm of the drill, and visa versa, the smaller the drill bit the faster the speed you will need from the drill.
e.g. using 3mm drill bit in steel you would need 1580 rpm. Whereas a 25mm drill bit should go 210 rpm! Many people have one speed for both!
4 – Too much/not enough pressure.
You do need constant and even pressure on the drill bit, basically simulating the pillar drill. Too much and break the drill bit, too little and you will skate on the surface of the material, and blunt your drill bit. As with the rpm, pressure is size related, the larger the drill bit, the more pressure.
5 – Piloting.
This means using a smaller drill bit to pilot your final sized hole. This is very important for both steel and wood. If you don’t pilot wood, it will split when you put your woodscrew or other fixing into it.
Masonry and tiles doesn’t need to be piloted.
6 – Lubricant.
Lubricant is required when drilling steel or other metals, this aides to cool the drill bit. The problem with drill bits is they are heated to temper them, and therefore heating them again will reverse the tempering process. If you don’t use lubricant, you will find your drill bit useless if it continually heats and cools with each use.
Diamond and tile drills need lubricant too. Usually water, with better diamond drills you will find they come with a water reservoir that can be used in situ on the fitted tiles.
Lubricant not only cools the drill bit, it acts as a catalyst to cutting and catches the swarf created from the waste materials.
NEVER use WD40 or similar aerosol lubricants!
WD40 is a joint lubricant, and when it gets hot evaporates and therefore useless. 3-in-1 oil is better, but a dedicated lubricant such as Molyslip’s MWS, (metal working spray) or MWF (Metal working fluid) are ideal for this job. Dormer have their own product (Dormer SuperCut) which is just as good.
7 – Patience.
Sometimes it will take a lot of time for you to finish your hole, especially if you’re drilling a very large one. If you’re using a diamond drill that’s 200mm diameter, it won’t be fast and you’ll be there a long time. You’re basically using the abrasive of the diamond to cut through the granite, masonry, breeze blocks or whatever you’re drilling.
8 – Having the drill on reverse.
Yes, this is a very common error. Everyone has done it, make sure you have the drill bit is spinning to the right, unless you have a left handed drill bit! If it spins to the left it will not cut into the material and will just heat up against the surface of the material you’re cutting.
9 – Drill recognition: Choosing the right drill bit.
As, said earlier, don’t use the a masonry drill bit for steel or a steel drill bit for masonry. Easy drill bit recognition.
Look at the tip of your drill bit:
Arrow point – if it has an arrow point it’s for tiles. (this point is usually tungsten carbide)
Segmented teeth – This one is tricky. If they are sharp then it’s for wood or metals. (Starrett holesaws) or can be tungsten carbide for metals or masonry.
A split point/single point with two slow spirals – Usually for brass or plastics.
A split point/single point with fast spirals – Usually for stainless steel or harder materials.
A bit with a brazed tip – This is tungsten carbide tipped. Either for masonry if it’s blunt.
A bit with a brazed tip, with a sharp point This is a precision steel/hardened materials drill bit. This will cost a lot more than a standard drill bit for metals.
Segmented flat/sparkly teeth – This is diamond, generally only used in a dedicated drill.
I shall write a more comprehensive list at a later date.
10 – Covering the ventilation holes while drilling!
Very commonly done. Your tool needs air to go through it to cool the motor while it runs. Don’t put your hands over the air holes or it won’t work, it will heat your drill up and burn it the armature or coils out.
11 – Not cleaning the tool after use.
Another common problem. After using your drill, clean the ventilation slots (see no 10), the chuck, and anywhere that’s got material on it. Your drill will last many years longer if it can function the way it’s designed to.
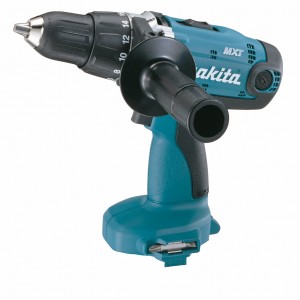
12 – Choosing the right type of power drill.
Going Cordless?
Disadvantages –
Firstly.
Let’s think about cordless drills, which are limited to battery life and power. Mains, or 3 phase drills are constant and don’t need their components changed as quickly. If you have a 2AH, the drill may last around 2 hours before you have to charge it again, and so on.
Secondly.
Another thing to consider is the power from a battery. It will NOT be as powerful as a mains drill even with Lithium Ion batteries. So may be limited in this regard. Especially if you want to drill large or many holes.
Thirdly.
Costly in comparison with a mains machine of the same power.
Fourthly.
Never drop the charger! The charger is most delicate part of this package, if it’s dropped you can no longer charge your tool.
Advantages –
Firstly.
No leads. If you don’t have many power outlets to take your drill from then this is a big advantage.
Secondly.
Ease of access. Go anywhere and use your drill, up a tower, down a drain.
Thirdly.
Even with batteries and charger it’s lighter than the mains drill.
Fouthly.
Cordless machines are usually drivers too! So you can use them to drive in your screws.
Going the standard mains powered drill way?
There are many advantages highlighted above to using a mains drill. If this is the way you decide to proceed then you will need to make decisions about whether you want a clutched machine, (this will stop your arms from being ripped off if the drill snatches.) braked stop, (which means the drill will stop by braking the drill rather than gradually slowing down) whether you want a keyed or keyless chuck or whether you want an all rounder or a dedicated machine.
Going SDS or dedicated hammer drill?
Technical Information
SDS stands for Spannen Durch System and was created by Bosch in 1975, translated to English it means “Clamping System”; It uses ball bearings to clamp the drill bit into the chuck allowing it to be used vigorously by the hammer action of the drill.
If you’re drilling metal, you will not need a hammer drill.
If you’re drilling masonry, will this be the only type of material you’re drilling? If so would a dedicated SDS machine be the way to go? It may be better to get an all around machine if you’re using it for many materials.
After all this you will need to consider the power you need for your machine.
Choosing the right Wattage
Looking at the difference between DIY and Professional machines the first thing you will see is the difference in price. If the DIY machines are as good, then why the difference in price? Many! They show their wattage in a different way. The components are better quality in the Professional machines. Check the rating plate on the side of the machines before buying them, to get a better idea of their specifications.
Hope this helps. We shall post our drill review soon.
yaa, I faced these mistakes and thanks for this amazing article.
Hello.This article was extremely remarkable, Yahh I also mistake when I was drilling. Helpful article sharing.
Yes good article useful for a layperson like me.
But I have a more concerning problem, ie how can I tell if my drill bits are blunt, just by looking at them….ie without trying to drill and it is not doing the job?
I have so many drill bits that some are used often and some are not but unfortunately, they are mixed up in a box
Thanks for your advice
With an HSS, wood or metal drill bit this is easier; you will need to use eye and touch.
Firstly by sight; look at the flutes to see if the drill bit is shiny, this is usually a give away to if the drill is blunt. But not always. You will need to inspect the drill bit with your fingers or old cloth/spong (something you don’t mind cutting or marking) to make sure.
So secondly; carefully touch the two flutes of the cutting edge. If it IS sharp enough to cut metal, it’ll be sharp enough to cut your fingers, so be very careful not to cut yourself. You should be able to feel the sharp edge against your fingers, if it pulls against your skin. If it doesn’t and the drill be it dull, then it’s blunt.
Masonry drill bits are much more difficult to test.
Thank you for your good information
Thanks
Drilling into a common field stone requires a carbide drill bit or a diamond tip? Which is best and should a hammer drill be used?
For drilling natural stone (rip rap) should I use a diamond tipped drill bit or a Carbide drill bit. The hole would be done with a 1/8- inch bit and 3/4 -inch deep into the rock.
The stone would be in water to cool the bit while drilled. Rip Rap stone is rough stuff but softer than river rock. That is the only way I can explain what it is like.
Bob on December 29, 2017 4:13 pm
Little bit more info to add you might want to add. Just like the larger the hole. The harder the material, the slower the speed. This may not always be the case but generally speaking this it true.
Thank you so much for sharing this post with us !! It really gives me information that I am looking for 🙂
These are detailed tips! This is so timely as I am looking for a drill as I will be mounting a safe in our wall. Thank you for sharing!
I absolutely love your blog and find the majority of your post’s to be just what I’m looking for.
Does one offer guest writers to write content in your case?
I wouldn’t mind writing a post or elaborating on most of the subjects you write with regards to here.
Again, awesome website!
We could do yes, write us something that you would like to see on the blog and we’ll post it if it’s good 😉
Wow, that’s what I was exploring for, what a stuff!
present here at this blog, thanks admin of this site.
Thank you for the great post
I’m 57 year old lady and just bought my first tools and this is gold. Thank you for sharing.
It’s good to know that you should use a smaller drill bit to pilot your larger hole. My brother needs to do some drilling for a project that he’s building. I’ll pass this information along to him so that he can drill accurate holes.
Thanks for the post, I am a mother and this helped me! I really dont know the difference between any of these drill bits, and still not sure.
Thanks for this great post, I find it very interesting and very well thought out and put together. I look forward to reading your work in the future 🙂
I appreciate you mentioning the importance of using the correct speed settings to ensure you get the desired finish when drilling. My wife is getting into more DIY projects like a chair made from pallets and different shelving systems around the house. I imagine some jobs like deep hole drilling that require precision and special equipment are better left to the professionals.
Good point, when it comes to drilling a hole deeper than 12mm (1/2inch) in steel or any other hard materials, and you want to keep the hole completely straight it’s advisable to leave it to the professionals. The deeper the hole the less precise it will be, unless using very expensive equipment to aid the process.
Cordless hammers are very suitable to use. anyone use these amazing tools. Thank you for the post.
Wow, what an informative article you published here. Real information helps to avoid common mistakes when we use a drill. Hopefully the articles will help a beginner. Thanks for sharing.
Great tips, thank you. My problem is Tiles – no idea what I am doing wrong! I have a tile bit, wet tiles, slow speed, stop often, taped up.. and yet it still feels like I am using one bit per tile sometimes! It is uncanny. Researching what I could be doing wrong brought me to your page. I think I mostly do all the things right. I’ll continue trying!
Tile drilling is a difficult issue. It depends on the kind of tiles you’re drilling; recently many companies have changed the type of tiles they use for walls – Now using ultra hard porcelain tiles, for best results a hand drill should NOT be used because of the constant pressure that must be used (not much good if the tiles are in situ on the wall already), lots of water as lubricant, must be 90 degrees to the work, tape to center the drill bit and lots of hope. The best kind of drill is definitely a dedicated diamond bits BOA which come in various sizes.
Hope this helps, although it sounds like you have already tried all this.
Very helpful information. Thanks.
I have a question. I am drilling 16 half inch (13 mm) holes in concrete.
Is it better to start with a quarter inch (6.5mm) masonry drill, then 3/8 in (10 mm), finally half inch, or use the half inch (13 mm) only?
I have a 1050 watt Metabo 240 volts Hammer Drill.
Thanks from Australia.
Thanks for your question.
Most masonry drill bits are designed not to be piloted first – masonry drills use a different method to make the hole using a continual hammer action more than the very sharp cutting edge and a constant heavy pressure that a drill bit for metal would be using. The only real exception to this is when using a core drill, which needs a pilot for the drill guide and keeping the cut straight and stable.
The answer really depends on the quality and consistancy of the concrete; what ratio to stones or hardcore, sand, bricks, rebar or whatever random stuff to cement. If you do use pilots, you may be making the job harder, longer and even end up damaging your drill bits.
As you’re aware concrete isn’t the same kind of uniform density as steel, plastic or brass, which are made up of more-or-less the same density of material throughout, so these need piloting. It’s more like cast iron which during the casting process can have impurities, thicker, thinner, harder or softer regions and even air pockets. You may find yourself drilling easily into the material at first, then the drill bit snatch or drilling suddenly becomes very difficult with both concrete and cast iron. Having a clutch in your hammer drill (like many dedicated core drills) will stop the snatching effect and save your wrists.
If you do decide to use a pilot, it should be a single small pilot around 1/2 the size of the hole size as it won’t make that much difference, except to the time you’re taking. Turning the hammer fuction on should make this pointless. If it’s more like cement then the consistancy of the material is more uniform without as many stones/rebar/bricks/etc and if you wanted to then you could use a pilot drill with hammer off and this will make a cleaner finish to the hole, but will take more time.
Hope this helps.
Spot on with this write-up, I seriously believe this web
site needs a great deal more attention. I’ll probably be back again to read more, thanks for the
information!